
Taurus PT92 Econo Race Gun Series - Part I
 NOTE: This original post of Part I of this series seems to have disappeared from the database, so I am re-posting it. The rest of the series makes more sense when you understand the original project parameters.
Now that the shooting season is over, I can finally get around to getting the posts finished on the Taurus PT92 Econo Race Gun. I've had a few posts in the past on this project, and this first post will be a bit of a re-cap and will set the stage for explaining in future posts how I approached each challenge, and what the final (?) resolutions turned out to be.
First off, what were my goals, in short, what was I trying to accomplish, and what characteristics did I want the project gun to have?
1. Total cost less than $500.00, ready to go.
2. Extremely durable and reliable.
3. Not picky as to ammunition.
4. Reasonably accurate compared to other 9mm. handguns.
5. Parts reasonably priced and readily available.
6. Suitable for left or right handed shooting.
7. Single Action only
8. Red dot sight system.
9. Smooth trigger, around 2 lbs.
10. No exotic manufacturing processes, materials, or machining.
11. Able to be competitive at the local club level.
Let's look at these one at a time. I chose a Taurus PT92 9mm. as my starting point, for a couple of reasons, the first being that I happened to already have one. I paid $275 for it a few years ago, and they are still available in the $300 dollar range. The Simmons 42mm. Red dot sight was around $35.00, the Weaver sight rail came from Walmart for about $7.00. A Hogue rubber hand grip sleeve was around ten bucks, I think. A few bits of aluminum out of the scrap box, a short piece of used stainless steel shafting surplus'ed from a sewage plant, and a few bucks worth of Allen head screws round out the materials and costs. Total cost well under $400.00.
The Taurus is basically a Beretta built under license in brazil. The first PT92's did not have the ambidextrous safety, and the magazine release button was at the bottom rear corner of the grip. If I was going to buy a PT92, I would look for the slightly newer PT92's with the mag release at the rear of the trigger guard.
One of the things that caused the Beretta to be selected as the replacement for the 1911 was the fact that it seemed to feed just about anything you put in the magazine. I have had almost no feeding troubles, although some factory loaded hollow points would hang up on the bottom of the feed ramp once in a while. Seating the bullets .010" deeper solved the problem. Slightly more pointed hollow points also solved the problem.
The Taurus I used for this project had already had a lot of rounds fired through it and it was a bit on the loose side. The barrel was a little loose in the slide, and the slide was a bit loose on the frame. Something would have to be done about that.
The extractor was worn on the Taurus, so I called the Taurus folks and ordered a new extractor, extractor spring, and extractor pin. All combined, including freight, was under twenty bucks, and I had the parts in a week by regular mail.
The very first PT92's did not have a safety lever on the right side for left handed shooters. The later ones did. A little creative engineering and machining, and I was able to get a safety lever on the right side.
As originally manufactured, the Taurus is a Double Action / Single Action handgun. Converting it to single action would allow a lighter trigger return spring and therefore a lighter trigger pull. It also means that you would have to manually rack the slide to cock the hammer for the first shot.
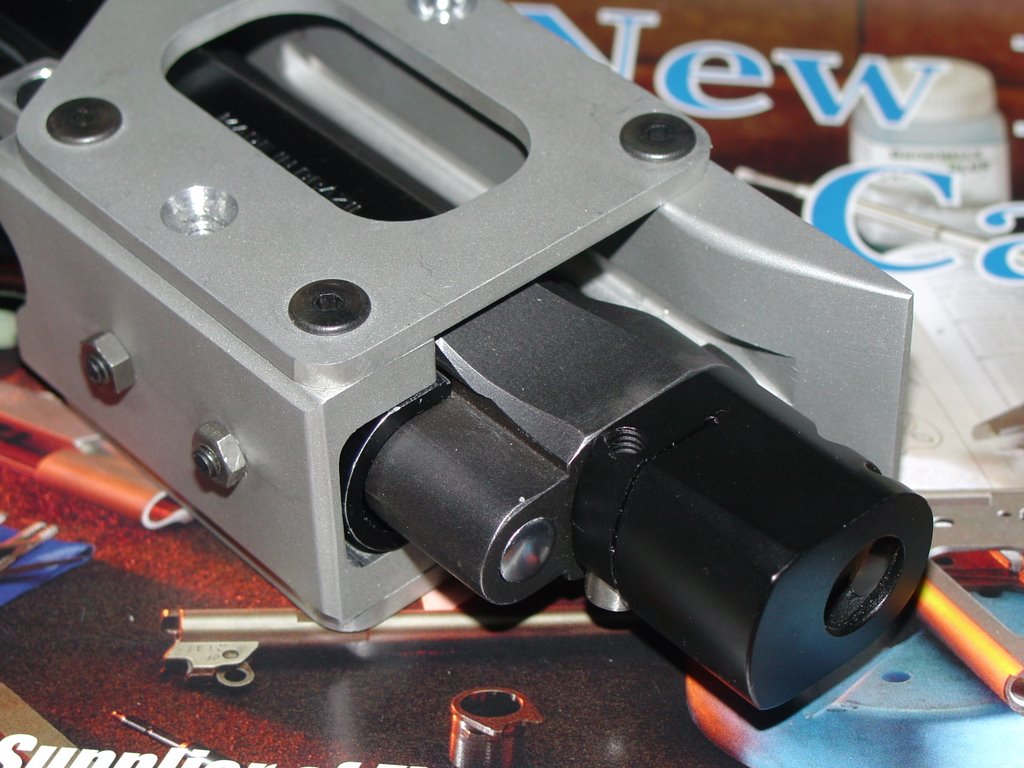
The parts that I needed to fabricate were all made using either a small milling machine, a small metal lathe, a drill press, and hand tools. Since I had access to a glass bead blast cabinet, I used bead blasting to put a matte finish on the parts.
Through the latter part of this past Summer and Fall I have competed several times with the Taurus, and it's obvious that the gun is competitive at the club level.
Not only that, it's fun to shoot!!
End of Part I. (Stay tuned!)
This series of posts are a description of what I did to my own personal Taurus PT92 to modify it for my particular usage. This is NOT a Do-It-Yourself instructional series on how to modify YOUR Taurus. What you choose to do to your own Taurus is up to you and your gunsmith. Just because it worked for me is no guarantee it will work for you.
Do not make any modifications to ANY firearm without consulting a knowledgeable gunsmith first!


1 Comments:
Good read..
Very enjoyable!!!
Post a Comment
<< Home