
Taurus PT92 Econo Race Gun Project - Pt. IV
 In the last three parts of this series we tidied up most of the internal bits. There's still a little more to be done on the inside, but it's time to start work on the sight mount assembly. The total sight mount assembly consists of six pieces; the U-shaped lower mount, two mirror image side plates, the top plate, the blast deflector, and the sight mount rail. Everything is held together with flat headed Allen bolts from the hardware store.
The toughest part to make was the bottom mount. Making this part with anything but a milling machine would take far more patience that I've got! I started with a block of aluminum out of the scrap bin, and started sketching on the outside of it the approximate shape I was looking for. Over to the mill for a few cuts, then try it for fit on the Taurus.
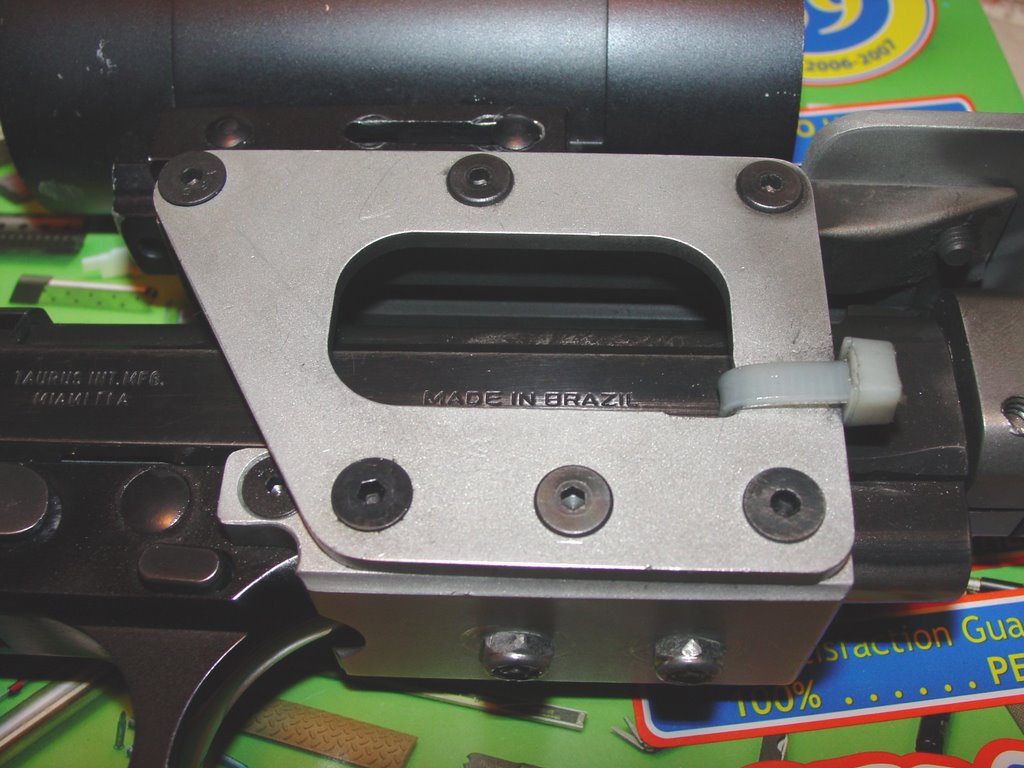 The bottom mount and side plates.
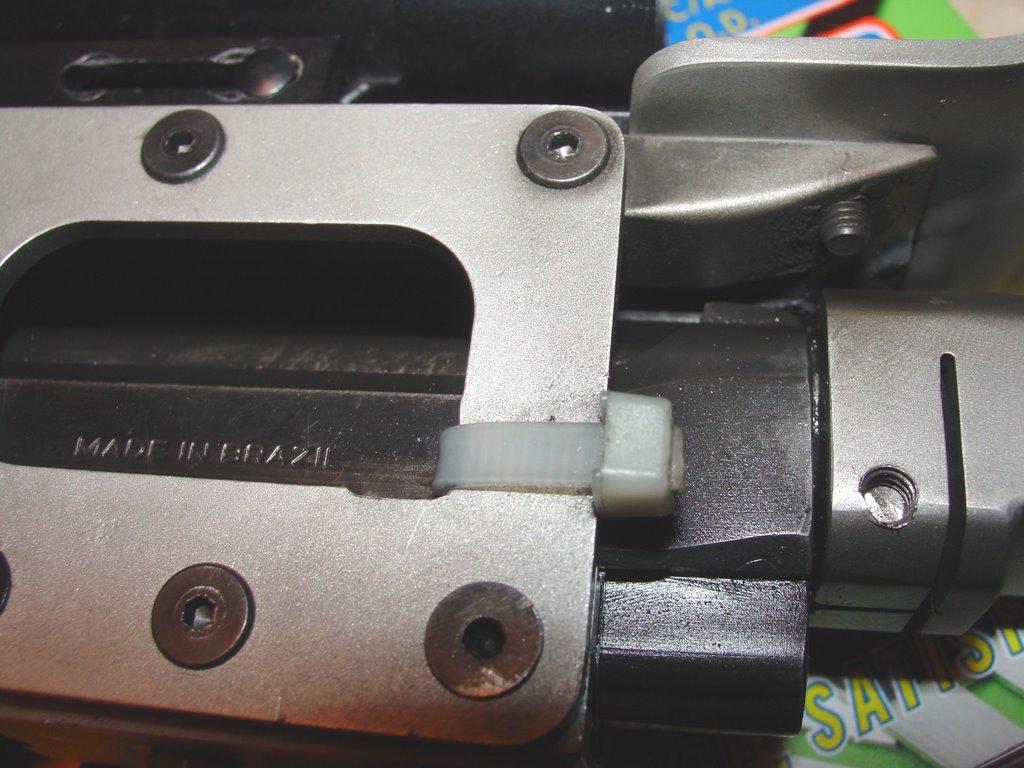 Cable ties? Indeed.......
The top plate was band-sawed to rough size, then brought to correct size with the milling machine and disk grinder. It's not clear in the pictures, but I elected to machine a groove the length of the underside of the top plate to clear the front sight, allowing the top plate to be closer to the barrel.
Locating the holes in the sides of the top plate was tricky, as it's top surface needed to be parallel with the barrel bore, but there was no easy way to line them up, so I did the best I could, and it turned out pretty close. When sighting it in it became apparent that the front was a little bit higher than I would have liked, so I put an .015" shim washer between the lower mount and the front of the Taurus, held in place by the front Allen bolt.
The last part of the sight mount to go on was the sight rail itself. I used a sight rail for a rifle that I picked up at Walmart. It was seven or eight bucks, I think, including screws!
 Side plates, blast deflector, and top plate.
The first blast deflector was made out of roughly .080 aluminum, and was held in place by two 6/32 stainless screws. The aluminum turned out to be too light and the blast was bending the deflector upward. After about 100 rounds had been fired, the two 6/32 screws gave up and the heads pulled off the screws, leaving the threaded shanks still in the holes and sending the deflector flying! Some VERY careful drilling and I had the broken pieces removed from the holes. I built a new deflector out of 1/8" aluminum and mounted it with 10/32 hardened bolts. Problem solved!
After all the parts were built and had been test assembled, I hand deburred and rounded all of the edges, then glass bead blasted all of the pieces to give then a nice even matte finish. A final cleaning and degreasing with some lacquer thinner, then a tiny bit of Loctite on the threads, then final assembly.
Oh, the cable ties, you ask? Since there was some side to side play between the slide and the frame, I decided that I needed to come up with some sort of "buffer" to keep the slide centered, and more specifically, to be sure it returned to the exact same place every time. What could I use that was readily available, inexpensive, durable, and was slippery enough that it wouldn't impede the slide movement? How about cable ties? I experimented with a few different thicknesses, and it turned out that one was just right. Lots of people have noticed the cable ties, but not one of them has asked about them!
Maybe they think the cable ties are holding the gun together, and just REALLY don't want to know for sure?
This series of posts are a description of what I did to my own personal Taurus PT92 to modify it for my particular usage. This is NOT a Do-It-Yourself instructional series on how to modify YOUR Taurus. What you choose to do to your own Taurus is up to you and your gunsmith. Just because it worked for me is no guarantee it will work for you.
Do not make any modifications to ANY firearm without consulting a knowledgeable gunsmith first!


2 Comments:
It must be nice having your own mill! I am jealous!!
I understand everything you did with the project except the blast deflector. Would it have been necessary if you weren't using a muzzle brake?
I've never understood the reason for muzzle brakes on low-powered weapons. With practice, you learn to overcome the slight recoil of a 9mm, and we know you practice a lot, or we wouldn't be getting the reports of you being first or second in most of your matches.
Lose the muzzle brake, and the blast deflector, and you've lightened that weapon by a good 3 to 4 ounces at the muzzle, where lightness counts for instinct-point gun mounting.
BTW, if that blast deflector is of any use, it adds to the recoil that the muzzle brake is there to damp out, and that poses another "why?"
Post a Comment
<< Home