Taurus PT92 Econo Race Gun Project -- Pt. III
 In our last installment, we chamfered the magwell and re-worked the magazine release. Now we can get the magazines in and out more quickly, but it's time to address some of the other issues, specifically trigger pull.
For the types of competition in which I will be using this Taurus, double action is not needed. Removing the double action capability in itself, will lighten the trigger pull. How? I no longer need as heavy of a trigger return spring to pull against.
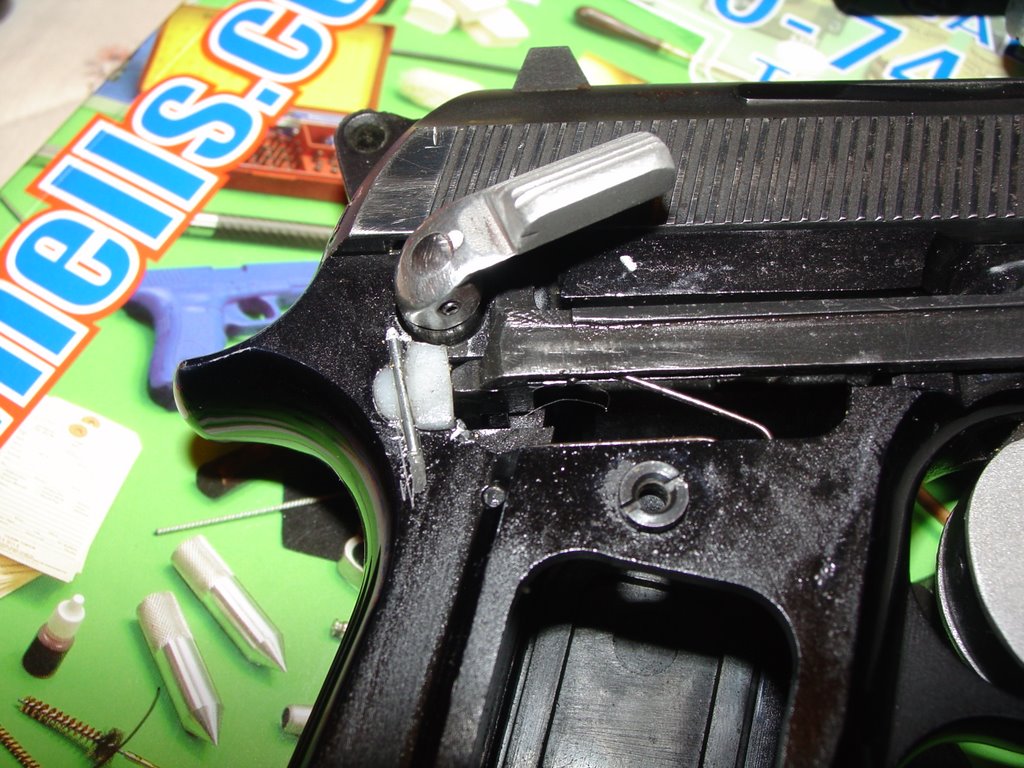 Trigger bar limit block installed in the frame.
First thing was to limit the trigger bar travel so it can't travel far enough rearward to "hook" the double action notch in the hammer. I contemplated several ways to do this. Anything that limits the forward travel of the trigger would do the job, or some sort of stop to limit trigger bar travel should do the same thing. After giving it a lot of thought, I finally settled on making a small plastic (Delrin, actually) block to slip into the notch in the frame aft of the trigger bar. A very slight flange on the stop block would keep it from falling into the gun. Exact angles and dimensions are critical, and a lot of careful filing and fitting went into making the part. Although it fit snugly, I figured it could drift forward if it was not secured in place by more than the grip panel, so I filed a small slot in the part and small matching slots in the frame on either side of the stop piece. A short piece of music wire pushed into the slot and a little peening to keep it from falling out when the panel was off solved that problem. I had to do a little bit of Dremel work on the inside of the right grip panel to get it to fit over the stop block, but it didn't take very much carving.
After removing the left grip panel, you can get the slide stop level spring loose, so the trigger pin can be pushed out. With the slide off you can see where the trigger spring sits, so I made sure I knew how to put it back together. I removed the trigger bar, the trigger, and the trigger spring, and had the old spring as a pattern. It's a simple spring to make, and I made one up out of lighter gauge music wire and put it all back together. While I was rooting around in there, I took a little bit of tension out of the sear spring too. Nothing exotic, just bent it a little bit!
With the trigger in single action only position, at least to my preferences, it sat too far rearward. I've always liked the feel of a slightly wider trigger anyway, so I decided a trigger shoe was in order. I bandsawed out a chunk of scrap aluminum to approximate shape, then started milling, filing and carving until it fit to the trigger. I drilled a hole through it and spot-faced in a bit to get the Allen screw's head below the surface. A little final contouring with the Dremel, a quick glass beading for a matte finish, and it was ready to install.
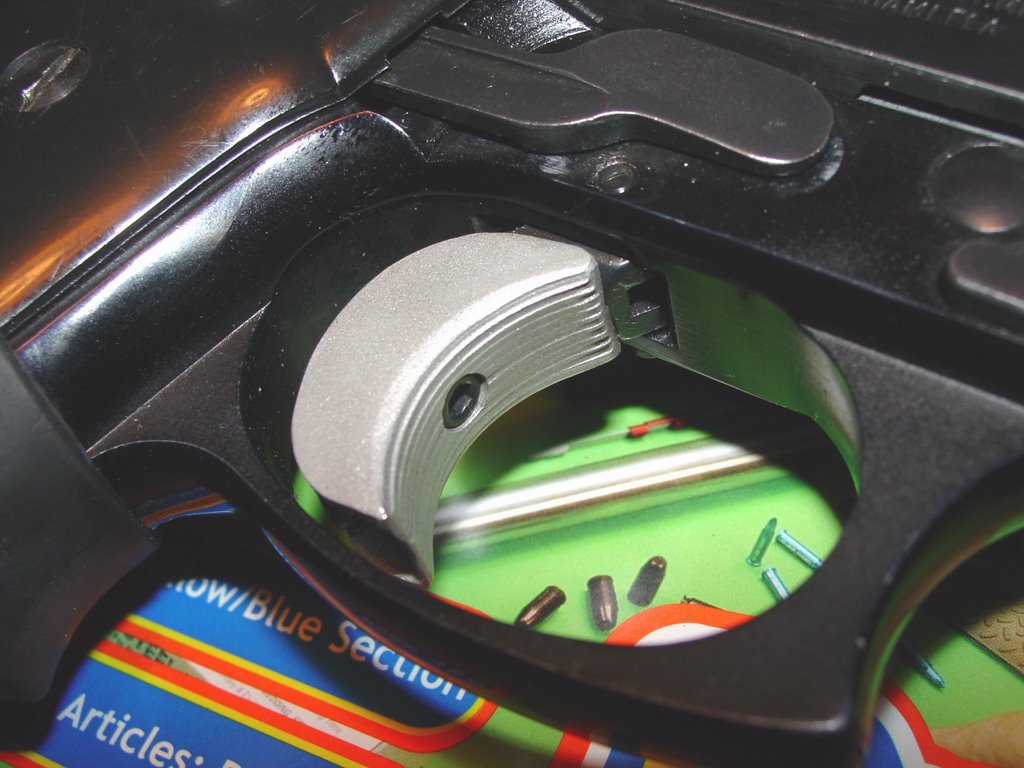 Trigger shoe in place.
I removed the trigger and held the trigger shoe in place so I could mark the spot to drill and tap the hole. I carefully centered the spring loaded centerpunch on the mark and pushed it down to centerpunch the spot. Not a mark at all, and the point of the centerpunch was slightly smooshed (don't you love those high-tech machinist terms!). The dang trigger was as hard as a drill bit. Probably a heat treatable steel in full hardened condition. Guess it's time for some annealing! I hung the trigger from a piece of wire and heated it dull red with the propane torch, then let it slowly cool off. I re-sharpened the centerpunch, and this time it center-punched just fine. A sharp drill drilled the hole, and then I carefully tapped it for the retaining screw. To take it back to it's hardened state, I heated it red again, then quenched it in water. I ran a file across it once it had cooled, and sure enough, it it was too hard to file. I wire brushed it a bit, oiled it, and put it back into the gun. A small drop of loctite on the retaining screw, then trigger shoe in place, and tighten the screw with an Allen wrench.
After cleaning and lubing everything, I put it all back together to see how it felt. Now the trigger was where it felt like it ought to be, and the wide face gave it a nice feel. The pull was noticeably lighter, but not quite as light as I would like, but there's still some more I can do to lighten it a bit more.
It's getting closer to the goal, but still has quite a ways to go.......
This series of posts are a description of what I did to my own personal Taurus PT92 to modify it for my particular useage. This is NOT a Do-It-Yourself instructional series on how to modify YOUR Taurus. What you choose to do to your own Taurus is up to you and your gunsmith. Just because it worked for me is no guarantee it will work for you.
Do not make any modifications to ANY firearm without consulting a knowledgeable gunsmith first!


1 Comments:
Woah! I've never ever seen anyone pimp a Taurus before. Good luck with this project.
Post a Comment
<< Home